Windows Default Printer

This guide is designed to help should you get the error message “no default printer selected” when using Payroll Manager with Microsoft Windows . You may experience this problem for the first time immediately following a Windows update.
Microsoft Windows has a feature whereby it will attempt to ‘manage your default printer’, which can cause problems when using Payroll Manager. You can disable this feature and manually set your default printer by following the steps below (note: your screen layout/graphics may look slightly different from those in the example the example below, depending on your particular Windows setup).
- Close Payroll Manager.
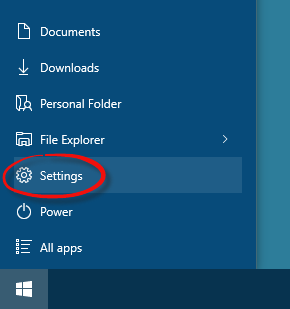
- Click on the ‘Windows’ button at the bottom left hand side of the screen, then click ‘Settings’.
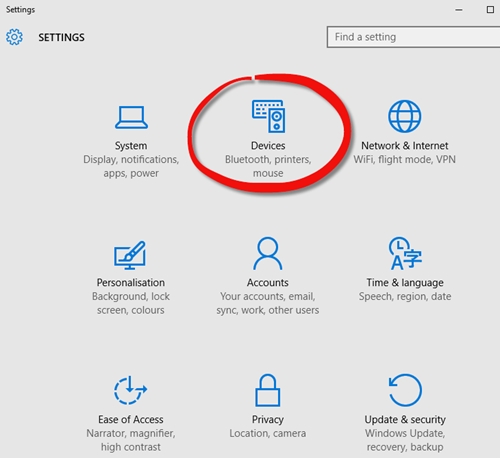
- Select ‘‘Devices’.
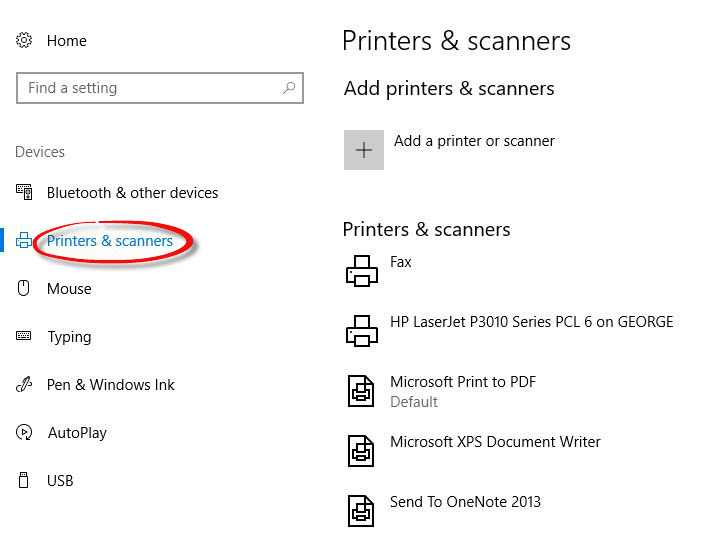
- Select ‘Printers and Scanners‘.
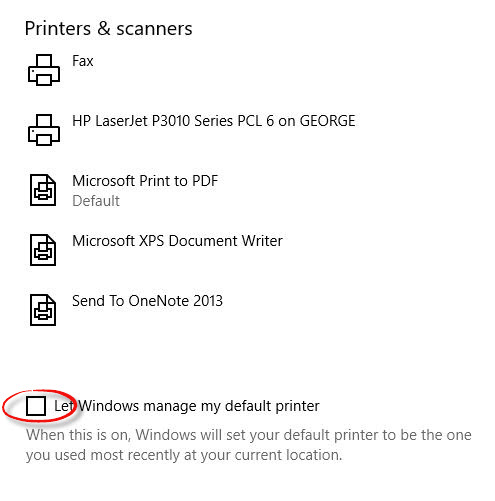
- Make sure that the box marked “Let Windows manager my default printer” is un-ticked.
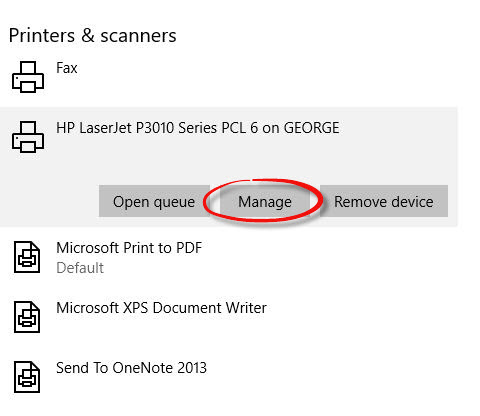
- Click on the printer that you wish to use and then click on the ‘Manage’ button.
- Click on the ‘Set as default‘ button and then close the screen. Run Payroll Manager and try again.
